
While there are definitely issues living on an island that’s earned its place on the planet as a direct result of tectonic activity, there are also advantages for those very same reasons.
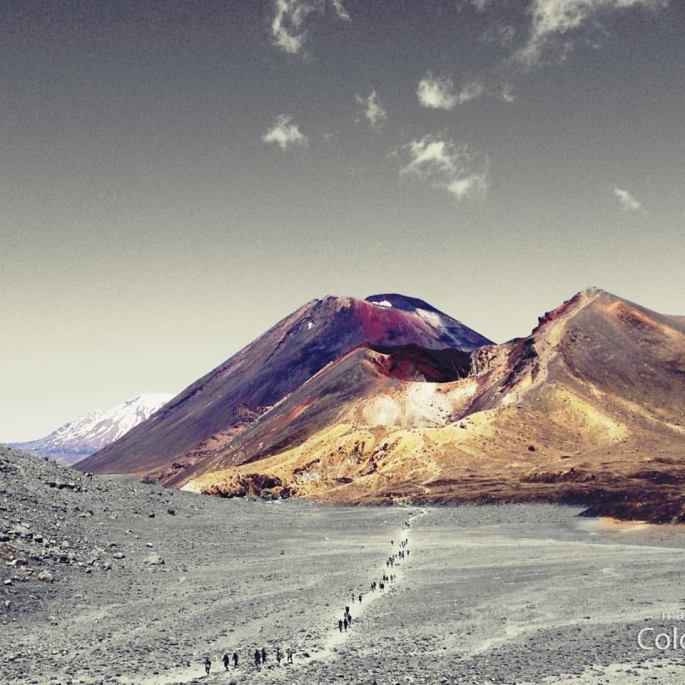
The Tongariro Crossing, New Zealand’s internationally acclaimed one day walk is one of the advantages. If you’re reasonably fit and want to take in some stunning volcanic vistas, you should take the time to do it. It’s not noted as New Zealand’s best one day walk by accident.

If you’re reasonably fit and can walk for up to 7.5 hours, you can do this. Without any add-ons (i.e. the summits of Mounts Tongariro or Ngauruhoe), you’ll finish the day having walked around 18km.
It is weather dependent. If the forecast suggests wind speeds in excess of 65kmh, the Department of Conservation recommends that you don’t do it. The top is very exposed with big drops on either side of Red Crater. You also need to be carrying food, water and clothing for all eventualities. It’s an alpine region where the weather changes quickly and with little warning.
The map below provides an overview of the track (marked in red). It’s taken from the www.tongarirocrossing.org.nz website. They also have a good pdf you can download, giving you all the information you’d need for the walk.

Many people do the Crossing from Taupo, itself an impressive caldera from an ancient supervolcano. You can book transport from Taupo (most hotels and motels can help with that), however, it is a longer drive to get there, necessitating setting off very early. There is plenty of accommodation in Taupo.
An alternative is to base yourself in National Park. While there’s less to do here, and accommodation is limited, it’s significantly closer to the walk (only around 20 minutes by bus rather than 1.5 hours).
I’ve done the walk from both locations and think that the more relaxed starting time associated with National Park suits me!
Stages of the walk
You should start at Mangatepopo and finish at the Ketetahi hut end. Firstly, I’d hate to come up the scree slope at the Emerald Lakes and secondly; if you start at Ketetahi Hut, you have an additional 300m to climb due to the difference in height between the two.
For simplicity, I’ve broken the stages of the walk into sections. My advice is not to rush it. Stop often. Enjoy the scenery. Take lots of photos – they’ll give you some stunning memories!
Mangatepopo carpark to Mangatepopo hut
The bus (you can use your own transport, but need a vehicle at the start and finish) drops you off at the Mangatepopo carpark.
This easy section of the track, some of which is over boardwalks, is flat and unlikely to cause you any difficulties. It takes you towards the initial climb, fondly referred to as the Devil’s Staircase.
Mangatepopo hut to Soda Springs
On reaching the Devil’s Staircase (which begins at the Mangatepopo hut), the upwards hike begins, and at this moderate to difficult stage your lungs and legs start working noticeably harder!
Dont forget to keep looking back. On a clear day, you can see Mount Taranaki in the distance – although you’ll need a decent camera to get a photo of it. While the track is much better than it was several years ago, you still need to watch your footing.
Soda Springs to Red Crater
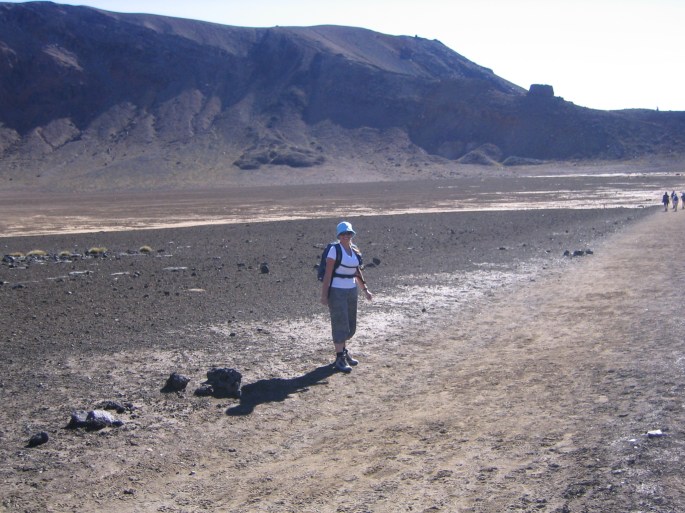
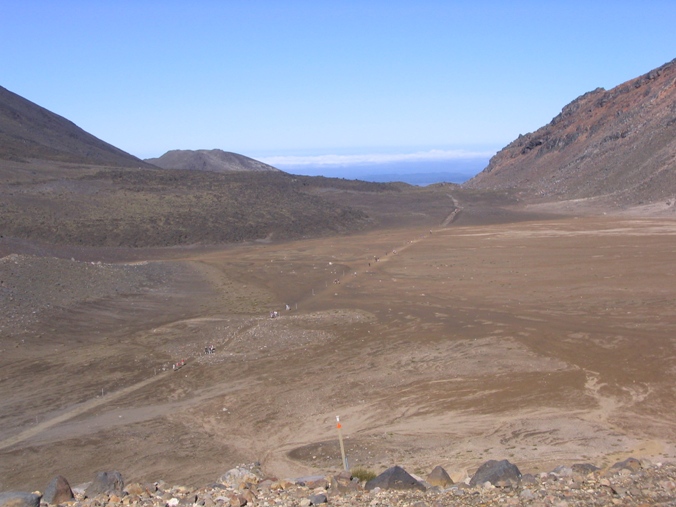
Once at the top of the Devil’s Staircase, there’s a well appreciated flat section. It’s a good time to take a breather, get some water in you and take more photos. You’ll start to appreciate just how many volcanic craters make up this plateau! The last part of the climb to Red Crater is moderate to difficult, but the plateau itself (seen below) is easy.

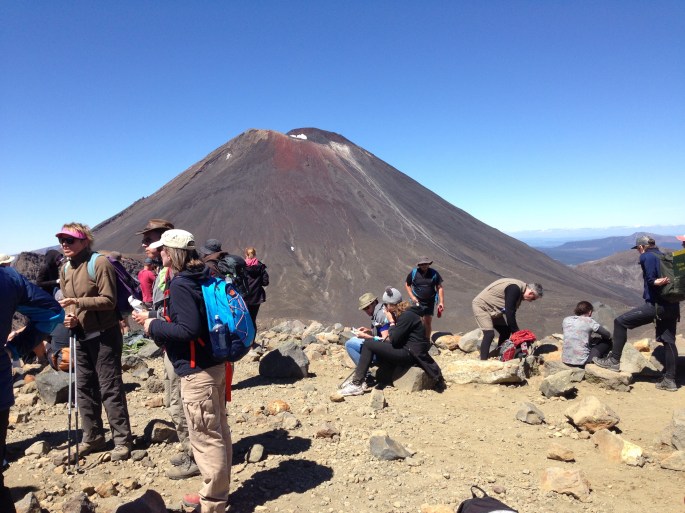
You can take a side trip up Mount Ngauruhoe from here. I’ve never done it, but the views from the top would be stunning. Access to Ngauruhoe is via scree slopes, so it’s dangerous and hard work. Allow two hours extra if you’re doing this.

It would be nice and peaceful without all these fellow trampers about! 🙂
You’ll definitely want to stop at the top, not just to recover but for more photographs. Red Crater is an active part of the volcanic system (last erupting in 1850). As you progress over the summit you’ll see evidence of some of its volcanic deposits from eruptions down to the left. Inside the crater you can see an exposed lava tube, formed when cooling lava flowed back into the crater:

Red Crater to Emerald Lakes
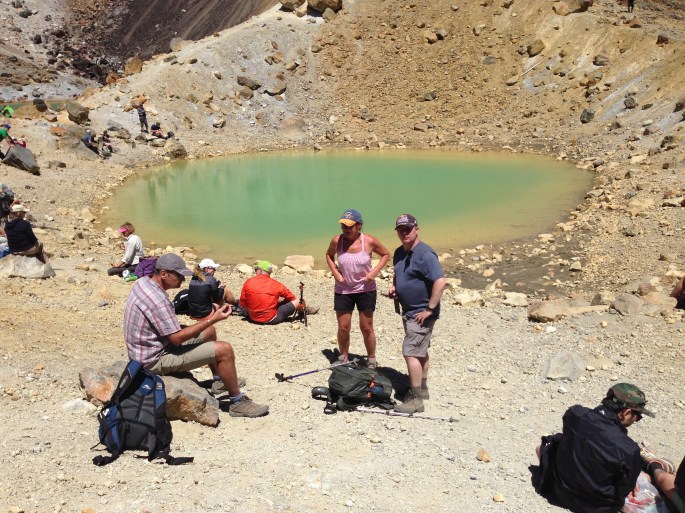
This moderate section is one of the most beautiful parts of the walk. Standing at the top of Red Crater, looking down to the Emerald Lakes for the first time is fantastic.
Then comes the scree slope descent! Having good walking boots helps keep you on your feet and off your bum. That said, even with boots I’ve yet to make it down without landing on my bum!
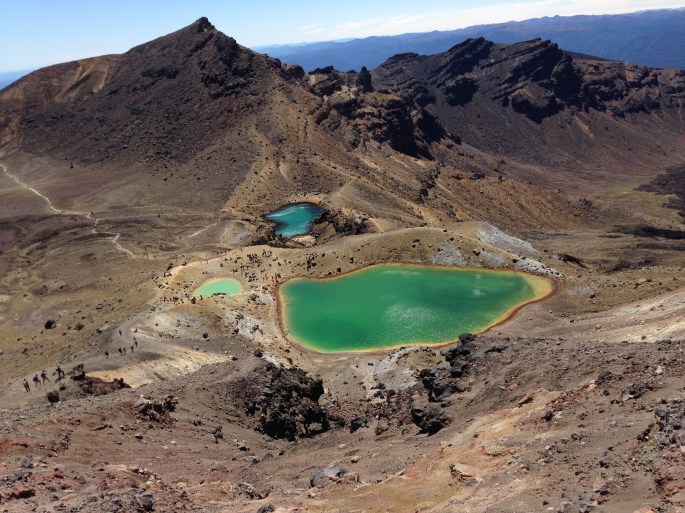
We usually stop at the Emerald Lakes to have lunch. It’s an early lunch, but you’ve done enough walking to warrant it! It’s a nice spot and is generally out of the wind.

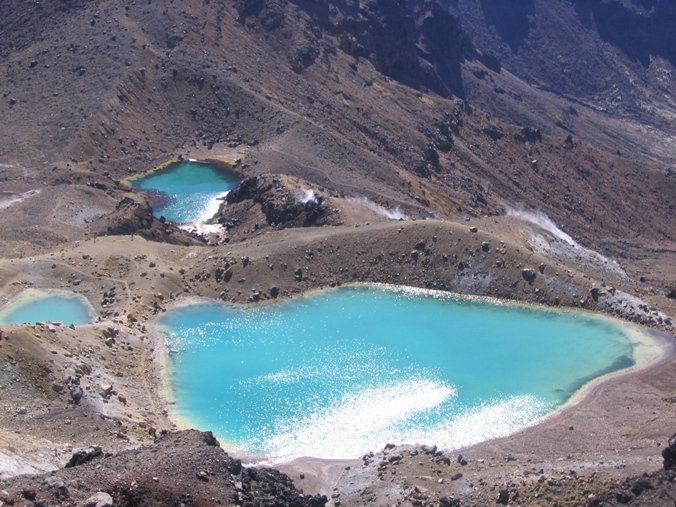
Emerald Lakes to Blue Lake

This is another fairly flat section. Once at Blue Lake look behind you. You’ll see the trifecta of Mounts Tongariro, Ngaurahoe and Ruapehu (with snow on it even in summer). Red Crater is also clearly visible. It’s my favourite photograph spot of the entire walk:

Blue Lake to Ketetahi Hut
The descent starts here as you zizag down the mountain. The toilets at Ketetahi Hut are busy (I often wonder if it’s just an excuse for a quick break!).

As you descend, you get great views of Lake Rotoaira and Lake Taupo.
Ketetahi hut to Ketetahi carpark
I’ll not lie – this moderate downhill stretch seems to last forever (it’s around 2 hours but feels longer). There were many times on the descent when I’d have gladly swapped the downhill for more uphill. When you get to the carpark, it’s a great feeling to get your boots off and wiggle your toes in the fresh air!
In Summary
This really is a highly recommended, outstanding one day walk, exposing you to some of the volcanic beauty of the central plateau. It’s not easy – you’ll deserve a beer and feed at the end – but neither does it require superhuman fitness.
The walk itself is free, although you have to pay for transport to get you there. The cost of this depends on where you’re coming from. If you have a car, I’d suggest you stay at National Park for a couple of days.
On both occasions our motel provided packed lunches. We topped it up with snacks that we wanted and 2 litres of water.
On a clear day, the views are spectacular and well worth getting up early for! You’ll struggle to find a better one day walk in the world, never mind New Zealand!
Helpful Hints
- Go out of main holiday periods (i.e. Christmas) if possible – The last time we went was just before New Year and it was very busy (albeit not enough to ruin your enjoyment).
- Water. Take 2 litres. Don’t skimp on it or you will regret it.
- Food. Take a packed lunch. You’ll be doing upwards of 30,000 steps so as well as keeping hydrated, keep yourself fuelled. It’s great to have little snacks that you can have when you stop to enjoy the view.
- Altitude. Although you only get up to 2,000m, it’s high enough to make you notice that the air is thinner (harder to get your breath) and it’s cooler than at sea level. Make sure you take waterproofs and warm clothing.
- Feet. While I saw people doing this in trainers, I’d suggest strong walking shoes or walking boots. It’s easy to go over on ankles in some places. I wouldn’t do it in trainers.
- Sunblock. Even if it’s not hot, apply plenty of sunblock. The UV in New Zealand is lethal and there’s very little shade for you on this walk.
Quick video of my last Tongariro Crossing
The last time I did the Tongariro Crossing, I made a quick video (disclaimer – I’m never going to be in the film industry with my cinematic skills). It gives you an idea of some of the views you’ll get on this walk though. Click here if you’d like to see it.
